Building a Cyber Gym
How I went from almost taking down our home network to building an isolated lab with Proxmox, pfSense, and WireGuard.
"why is the wifi so slow??" my sister wrote to the family chat. I didn't see it − I was distracted watching packets fly by that neither originated from nor were destined to my laptop. I had messed up the router's ARP cache by carrying out an attack I'd read about on the internet. This wasn't my first time performing an ARP spoofing attack, but it certainly was my last. At least on this LAN. My dad stopped me before I completely crashed our network.
Then an idea hit me. I need a Cyber Gym. A safe environment, where I can experiment and train my offensive skills. I already knew about virtualbox, but I always shied away from it. I thought − my laptop was barely running windows... how is it supposed to run multiple operating systems on top of my own?
I did some further research and came across Proxmox. The main difference between the two is that Proxmox is a type 1 hypervisor, meaning it runs directly on hardware instead of running on top of another OS (such as Windows, macOS or Linux), sparing a lot of overhead. But that also means people usually don't run it on their laptop − you need a dedicated server.
Hardware Prep
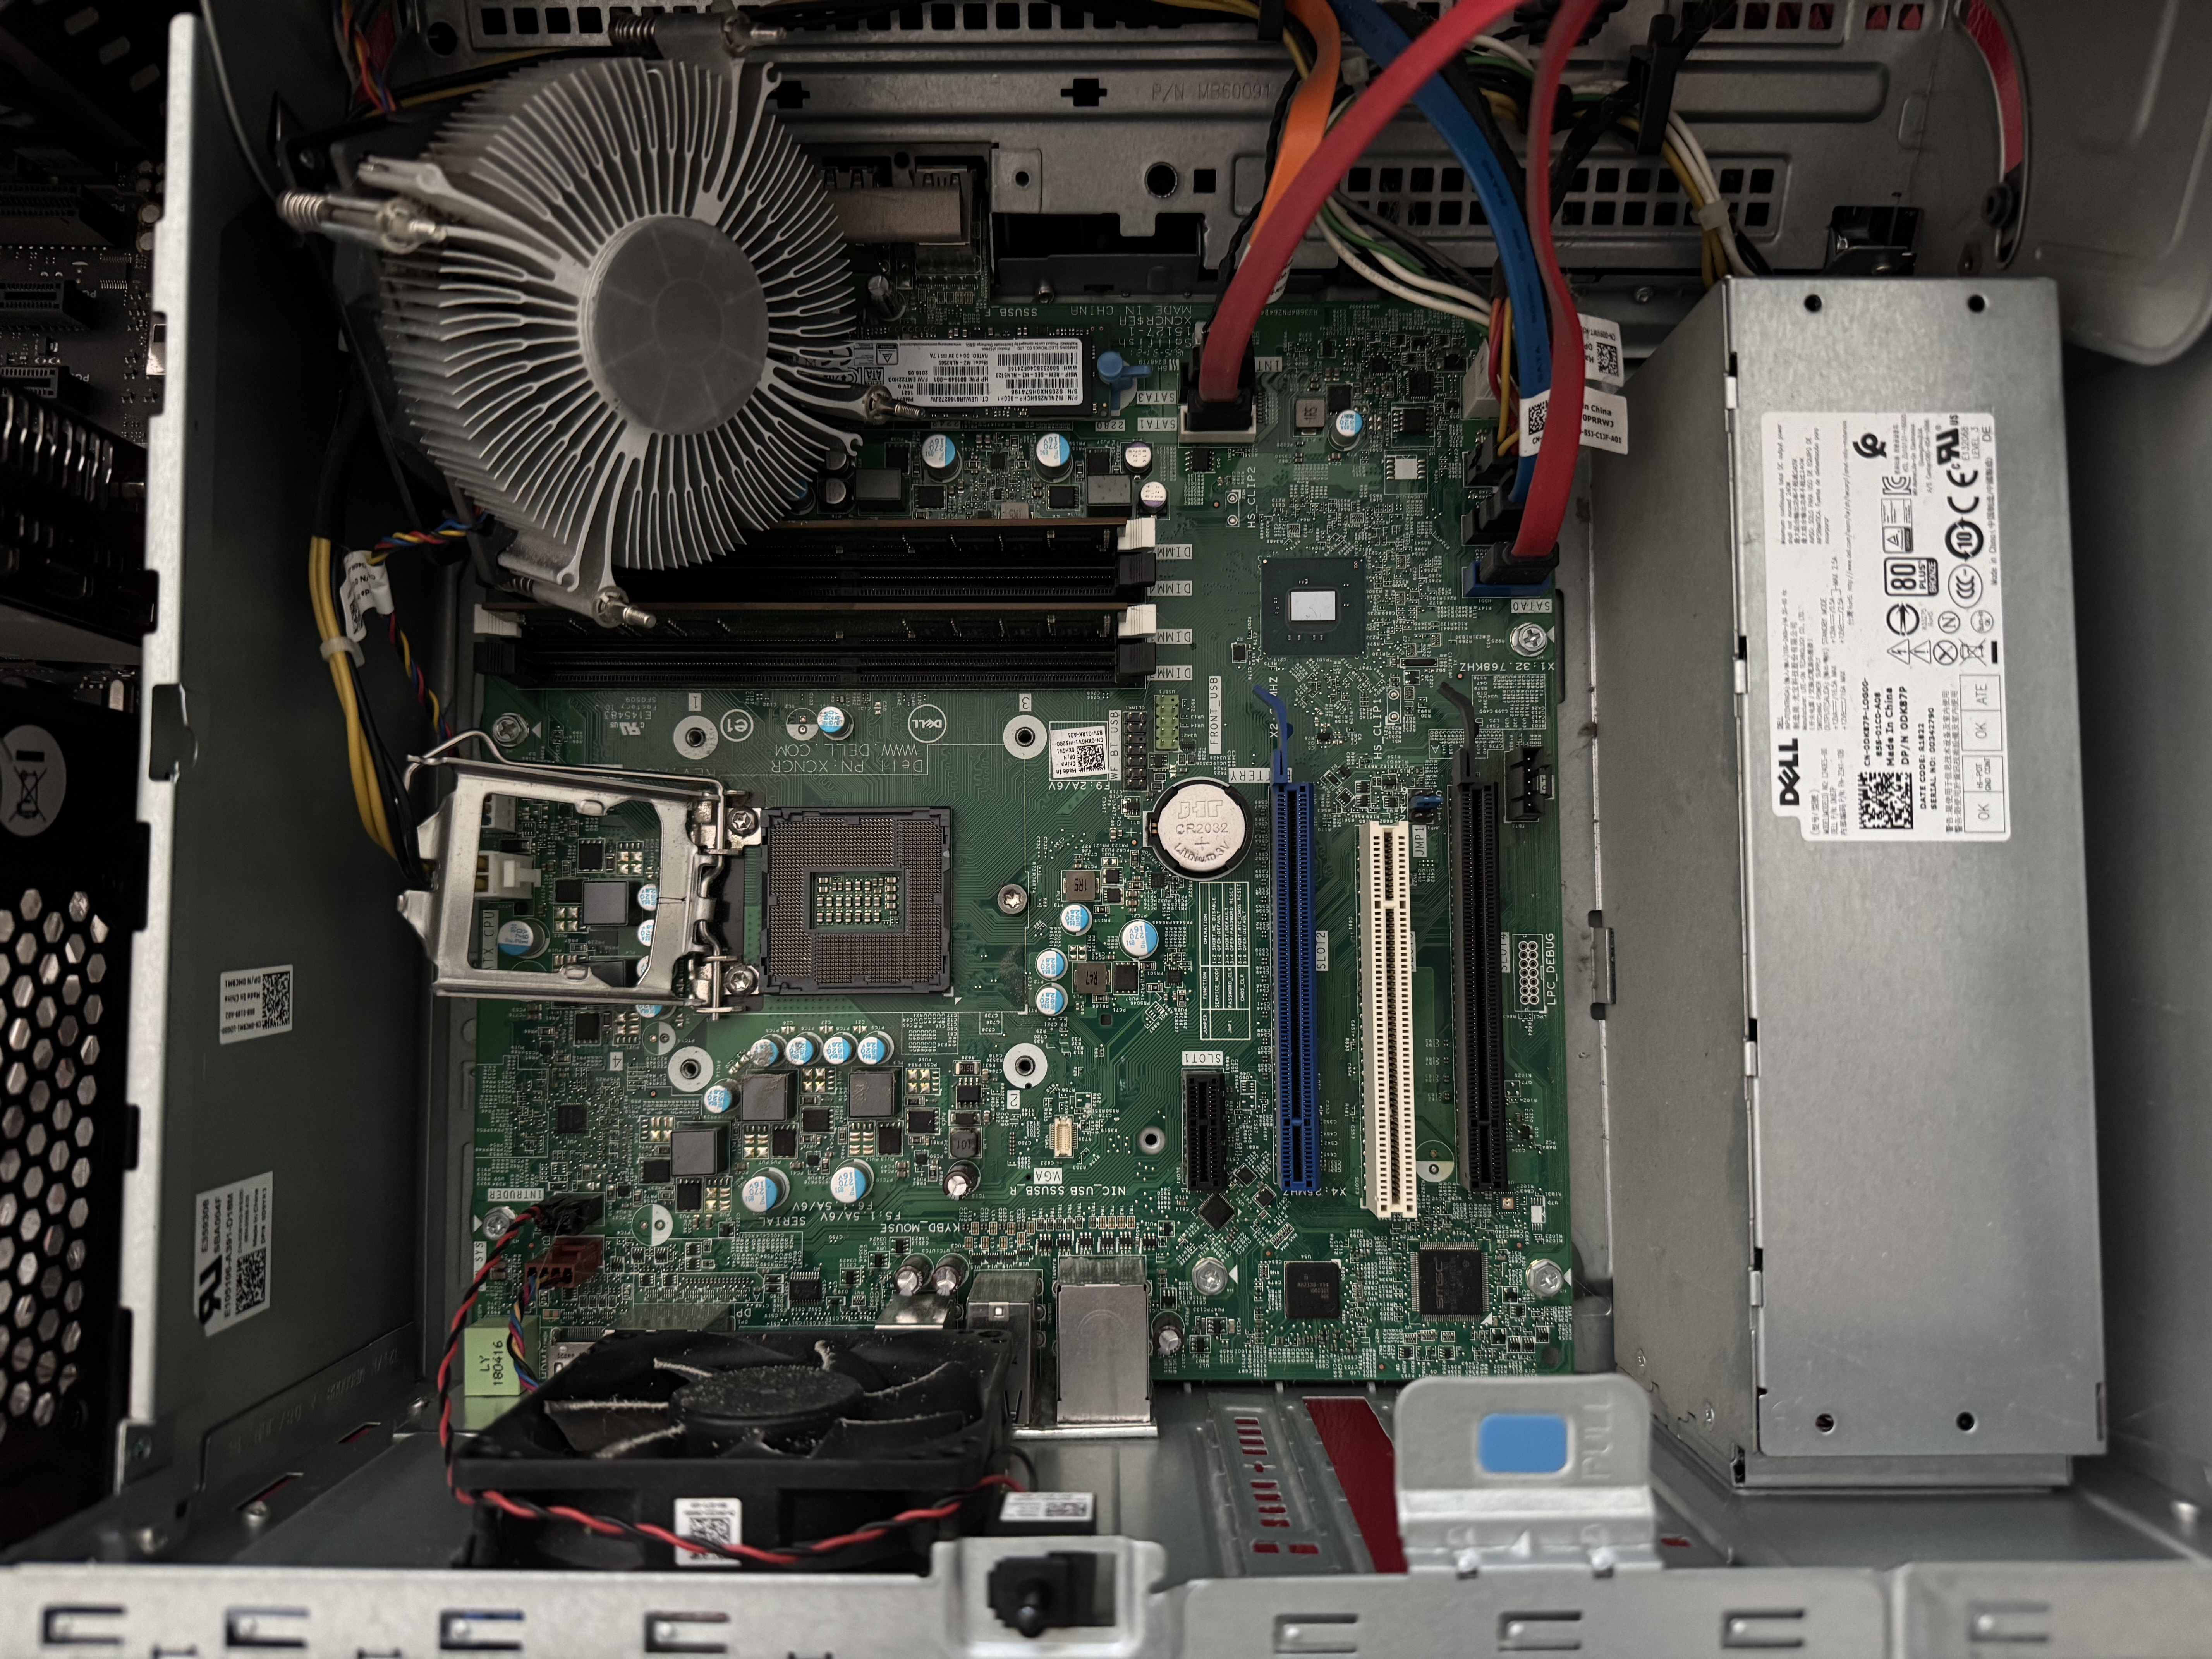
Luckily I already had something at my disposal − A Dell OptiPlex 7050 I bought for 300 CHF off of Facebook Marketplace back in 2022. It used to run a headless Ubuntu instance and occasionally came to use for deploying various side projects.
I altered the hardware setup for it to run more efficiently and found that the following specs matter most for virtualization:
- Memory
- CPU (cores more than clockspeed)
- Storage
So, I removed the graphics card and added two 8GB RAM sticks, which I took from another PC that was just laying around. I then flashed Proxmox to a USB drive and after going through the setup wizard it was ready to go.
Network Design
Of course I wanted my machines to be able to talk to each other. Proxmox
doesn't do this out of the box, but it provides network bridges which can be thought of as virtual switches. vmbr0 is created
by default and connects you directly to your home LAN. So, in order to create
my own network with access to the internet I needed two things:
- a bridge (virtual switch that my VM's are connected to)
- a router (for DHCP, Firewall, NAT, DNS etc.)
Creating the bridge was as simple as defining the subnet (in my case 10.10.1.0/24) and checking the VLAN-aware option. This will
be important later, when setting up VLANs. For the router I went with
pfSense. I settled on the following network design:
As you can see, pfSense is the only device that has the vmbr0 (placing it on the home LAN with its own IP) AND the vmbr1 interface, which is the "virtual switch" all other machines are connected
to. Important to note here is that the diagram is merely a logical diagram.
VLANs are separated by the switch at the data link layer. Would this be physically implemented, all VMs
would be connected to the same switch and it would look like this:
So, why the VLANs and not just put them on the same LAN? It's called network segmentation and is an essential part of network security. It gives the network structure, allows for custom firewall rule sets for each segment and adversaires have a harder time to move laterally through the network. I'm not that concerned about threats emerging in my lab network. I still configured VLANs to try and put my theoretical knowledge into practice.
Remote Desktop
Now that my network was ready to go the first machine I installed was Kali Linux. While the built-in no-VNC console was handy for quick debugging, it was way too laggy to do actual work. I looked into some alternatives and found two protocols that would be worth trying − SPICE and xRDP.
Setting up SPICE was super simple. I just changed the display to "SPICE" in the hardware panel and installed a client. That's it. To connect, I clicked on "console" and a session file downloaded, which I could double click to connect using my client. As convenient as it was, it still wasn't as smooth as I liked it to be. I seriously started questioning whether my hardware could be the bottleneck. But before investing into any upgrades, I figured xRDP would be worth giving a shot.
I already expected setting it up would be more difficult, since the xRDP service runs on the host, not on Proxmox like SPICE. That means before installing anything, I first would have to configure pfSense, so I could even reach my Kali machine. But while I was adding Kali to the port forwarding list, I noticed my laptop wasn't even able to ping pfSense from the home LAN.
Forwarding to Kali is pointless if I can't even reach pfSense. Temporarily disabling the firewall made clear, there indeed was some firewall rule denying the ICMP packets. Upon further investigation, I found a default rule on the WAN interface, blocking ingress traffic from private IPs. This rule would make sense if the WAN interface actually pointed directly to an ISP. But for my case, I can safely disable it.
Successfully connecting to Kali through SSH confirmed that I was able to reach Kali and could move on to installing the xRDP server. The service started without any errors, until I attempted to connect from my laptop. Looking at the error logs, I couldn't make out what was causing the issue.
[11:16:22:617] [237337:00039f1b] [INFO][com.freerdp.core] -
        [rdp_print_errinfo]: ERRINFO_LOGOFF_BY_USER (0x0000000C):The
        disconnection was initiated by the user logging off their session on the
        server. [11:16:22:617] [237337:00039f1b] [ERROR][com.freerdp.core] -
        [rdp_set_error_info]: ERRINFO_LOGOFF_BY_USER [0x0001000C]
Apr 23 11:21:27 kali xrdp-sesexec[36626]: pam_unix(xrdp-sesman:session):
session opened for user user1(uid=1000) by user1(uid=0) Apr 23 11:21:27
kali xrdp-sesexec[36626]: gkr-pam: the password for the login keyring
was invalid. Apr 23 11:21:30 kali xrdp-sesman[36306]: [INFO ] Session on
display 10 has finished.After countless Google searches and hours of troubleshooting that was
going nowhere, disappointed, I logged off from the SPICE client and took
a break. When I returned to re-examine the errors once again, I
connected to the xRDP server, typed in my credentials and BOOM! A 1024x768 sized window with the Kali Linux desktop. Turns out
my session managers were conflicting and closing all other sessions solved
the problem.
But when I tried to enter full screen, the window didn't budge. Resizing
also wouldn't work. I checked the display settings and there was only
one singular option − 1024x768. So I found myself back in
the xRDP config files and reinstalling xorg. Once again, I
was trying to fix the issue at the wrong place.
When trying out different RDP clients, one of them was able to resize
the window to full screen. That's when I checked the man page of my original RDP client and found exactly what I was looking for −
the /dynamic-resolution flag.
I finally felt content with my remote desktop setup. Until I thought, was it really remote? How would I safely access my lab from any other location than home? What If I need to access a machine from school or when I'm away?
REAL Remote Access
Usually, to access resources sitting in your home LAN from the outside, you need to configure port forwarding for NAT and update firewall rules in your home router. For my case, I'd have to do this twice − once for my home router and once for pfSense. Then, I'd have to open each single port for each single machine. Besides being incredibly time-consuming, it more importantly imposes a huge security risk. Each open port makes an attack vector. One misconfigured or outdated service would put my entire network at risk of a devastating attack. But luckily, pfSense has a built-in solution − VPNs.
By setting up a VPN, I could expose only one singular port, to which I connect to establish an encrypted tunnel to my lab LAN. It effectively places my remote workstation on the LAN alongside my other lab machines, allowing me to access them from anywhere in the world.
As for the protocol, I chose WireGuard for its simplicity and
performance. I updated pfSense through the console and installed
WireGuard from the package manager dashboard. After following a video
guide on how to configure a tunnel and add peers, I ran sudo wg-quick up lab on my laptop. I pinged 10.10.0.1 and... nothing. Running sudo wg show revealed that packets are being sent, but none
received. I already dealt with a similar issue earlier when pinging pfSense.
So, I checked the firewall rules.
The WireGuard interface passed all traffic and so did the wg0 interface. WAN passes all UDP traffic on port 51820.
Diagnostics say packets reach pfSense. So why isn't the server
responding? After triple-checking my pfSense configuration I finally saw
it. The WireGuard config file on my laptop connected to 192.168.1.255 instead of 192.168.1.225. This wasn't just any typo − had it been any
other mistyped digit I probably would've been debugging for 30 minutes
instead of 3 hours. Because 192.168.1.255 is the broadcast address
of the network, the packets were sent to all hosts − including pfSense. That's
why the packets reached the WireGuard server, but got ignored internally.
Conclusion
Finally, everything was set up and I was ready to create a few basic VMs. I added Windows 11, a Ubuntu Server and Metasploitable 2. I enabled RDP on the Windows machine and upgraded all packages on the Ubuntu server, before creating snapshots of every machine.
The time spent fixing all these faults made up the large majority of my time on this project, and at times it sure was frustrating. But they forced me to go down many paths I wouldn't have explored, if I would've had a perfect guide carrying me from flashing the Proxmox USB Drive to the point I'm at right now. Those detours taught me more about networks, virtualization and services than a tutorial ever could.
My future steps will likely include some hardware upgrades, as my 4-core i5 won't be able to keep up as the project grows. With the increased capacity I'll be able to install an Active Directory, a Windows server alongside some more potential targets. To also improve my defensive skills, I'm planning on setting up a SIEM (Splunk, Wazuh or both) collecting logs from the servers. I'll also set up IPS (like Suricata) and see how much harder it is for me to break into my servers.